Basic black ballet top McCalls

This is a simple but very wearable basic black ballet style top. Its a favourite style for me and made from my TNT McCalls 6612.

Its just plain black scuba.
I really made this for work but as you can see its just as wearable with my favourite play cothing;

Here its worn with my RP Cerena trousers.

I rarely make the more wearable practical stuff like this top because its kind of boring but really I should get round to a few more basic things like this because at least they are value for money because I actually will probably wear this one out. It is money well spent.

And for winter this will be very warm!

Take care and have a lovely day.

Thanks for popping by,

Bracken

Cape!

This has been a very long time in the making phase. I cut this out and started sewing up a whole year ago. I actually got to just needing to do the hems and then it was spring so I gave up on it.

I was inspired to make this ages ago before  when I read about it on Melissa Feyers blog https://blog.fehrtrade.com/gallery/3443/a-teal-wool-cape/

I did make a big mistake with all the stopping and starting making this I never trimmed round the inside of the hood edge so its a bit bulky at the front where the hood lining meets the hood outer ( its the only bit that is actually lined) and does not quite lie as flat as I would have liked. Melissa lined heres but describes it falling off her shoulders due to that and this is actually double sided fabric anyway so I did not line it. The pattern is meant to be unlined – not that its not pretty easy to add one ifyou wanted to but bearing in mind the inside of my fabric is nice to look at I never bothered. Other than that issue with the edge of my hood, I am very proud to have this completed at last. I was hard to make this despite I expected it to be easy.

I did not want the double faced fabric to look rubbish on the reverse side so I attempted to do french seams everywhere but the curved seams on the shoulders make this really hard and I had to give in and then used bias binding to tape all the rest of the inside seams. The end result is a very neat cape though so I am happy.

This is the original of this pattern:

I even had a go at doing invisible hems with my sewing maching which is not as easy as I have read it to be described. I missed a few bits and ended up sewing them by hand but the invisible hem function on the sewing machine is well worth trying out because its saved me hours of hemming by hand.

There are poppers sewn to the storm flap which covers the zip.

It was hard to get good photos of this the day I wore it because it was very windy. I think this is going to be a great autumn coat (cape).

Its worn here with my upcycled skull tshirt and my wide leg trousers – also Burda.

I like this so much though I am seriously considering making another cape now. Just not sure which pattern to use. I have loads of 1970s Burdas which seem to be full of capes so probably will make one of them – to justify keeping them of course. Though I kind of fancy making a traditional peasant cape of the kind that was in common use everywhere and by all classes during the last few hundred years.

Take care and have a lovely weekend. Thanks for popping by

Bracken

My very first pair of knitted socks

My Mum has always said to finally get to be a good knitter you must have made some socks. I always found socks daunting but I keep seeing posts on socks and I have all this yarn. Some of the yarn in my stash is hard to use because I accidentally bought lace weight mohair many years ago now. I managed to use some to knit this jumper which is a nice lightweight summer jumper.

I keep it in an organza bag and carry round with me because it takes up such a small space but its not the warmest of tops. Whilst reading other peoples blogs a while ago now I found this post on combining yarns to make different thicknesses.

 https://orcasislandknitting.me/2017/10/21/key-for-two-yarns-together/

This post explained to me that if I was to combine 2 strands of my lace weight then I could get fingering / sock weight. Well the idea of socks started to grow.

Well I have always done this (knitted two or three strands together to get eg chunky weight or to get a marl or to change the colours with stripey stuff) but never understood really the different weights and how to achieve them. I know double knit doubled gives chunky or what they used to call double double knitting wool when I was a kid!

My Mum used to regularly double up the double knitting yarns.

I also in the past I messed up and bought a large amount of lace weight yarn when I wanted chunky weight so I need to find a way to use it up.

This photo shows the difference in weight between normal mohair ( the thick strand ) which knits on 5mm to 8mm needles and lace weight mohair. 

I feel I should knit one pair in my lifetime. Then I wondered about mohair socks but it turns out that what I considered a fragile yarn is in fact one of the hardest wearing and is apparently ideal as a sock yarn. My yarn is mohair with nylon too which is apparently the vital ingredient needed in sock yarns! It makes them hard wearing!

This is the yarn I used for my first pair of socks – doubled!


I totally ignored the stitch guide and needle guide for this project.

I was still rather daunted by the small needles but what the hell. The worst that will happen is I unpick them and make something else. Winter is coming and I could really do with some soft warm socks. Then I looked around for patterns and I came accross the Winwick Mum site with a sockalong. Its an old sockalong from a couple of years ago but the different posts are all there and I decided to follow it.

This is the tutorial I followed: https://www.winwickmum.co.uk/2014/05/basic-sock-pattern-and-tutorial.html

I am now beginning a second pair but this time I am using 3 yarns to make them a bit thicker cos I worry the first pair may not wear too well. I read a article that said you should not be able to see through the fabric for good socks so this will be my second pair and have 3 strands but the same needle size etc. Though so far I am finding it much harder to knit with the three strands. Its much easier though to pick up both strands when they are different colours.

Here you can see the doubled yarn on each stitch.

You start this pattern on a slightly larger needle and knit the first 2 rows flat before joining into a circle. That makes it far easier I think. I only knitted a few rows each evening and suddenly I have a sock so I started the second one and then wow, I have actually got a pair of socks. The hardest bit is not actually the knitting but the grafting along the toes. I messed that up a bit but it doesnt feel uncomfrtable and I suppose I will get better at this. I had a similar problem with my Icelandic style jumper under the arms where you need to graft. I think perhaps this will be a case of practice makes perfect.

So here they are my new socks knitted on double thickness lace weight kid mohair.

I have not worn them yet being as its not cold enough so have no idea if they will stand up to being worn but I will let you know once I try them.

And heres my socks:

Ignore the dog. He was hassling me to throw his ball.

Here are my rather imperfect socks. I know there are quite a few errors in these but I did really feel I was achieving something when knitting these. On 2.5mm needles too! I actually had to slightly change the pattern – maybe I knit loosely? I found that the 30 stitches on the Winwick Mum pattern were giving me too big socks so I really knitted sock one twice but never mind. I ended up with 56 stitches for my socks and they fit great.

Also to pick up down the side of the gusset I actually used a small crocket hook because I could just not manage to do it with my knitting needles. That could be down to my hands though. I have arthritus in my knuckles so I cannot always manipulate things as I should be able to. Anyway a crochet hook worked well and I got my stitches on my knitting needle in the end.

I am now beginning a second pair but this time I am using 3 yarns to make them a bit thicker cos I worry the first pair may not wear too well. (Ignore the necklace. Its got nothing to do with this. I had just taken it off because it was annoying me.) I read an article that said you should not be able to see through the fabric for good socks so this will be my second pair and have 3 strands but the same needle size etc. Though so far I am finding it much harder to knit with the three strands. Its much easier though to pick up both strands when they are different colours.

Thanks for visiting my blog,

Bracken

Tiger top – making the most of oddments


This top is made using the McCalls 6612 pattern I seem to always return to at least once a year. In fact that pattern needs tracing before it finally disintegrates I have used it so much. Its very fragile these days. So strange to think I have nearly worn a pattern out!

The fabric is the small bits left over after my recent almost disaster altering my tiger track suit pants.  also cut a couple of other things from the bits but have not yet sewn them up into garments. The sleeves are a bit off grainline at the bottom. I never had enough for full length sleeves so cut 3/4 length and added a bit onto the end. I cut this as a kind f extension but added extra since was not too sure if the sleeves would work so never cut off at the right place meaning I had extra long cuffs. 

Then I decided I could ruche these which disguises the seam where the top of the sleeve joins the added on bit. To make the ruching I sewed 3 lines of elastic down the sleeve cuffs while pulling the elastic taught so it would ruche the fabric once I let it go. Then I sewed the lower ruched cuff onto the normal sleeve and then put the sleeves into the top as normal and did the side seams. Its worked rather well for left over bits of fabric I think. Though doing the twin needle stitched hems was a bit difficult with the ruching. Its very uneven but luckily you can\’t really tell because the ruching hides it.

The top is worn here with my black broderie skirt which feels a nice late summer or early autumn-y combination. 

For a few bits of left over fabric thats all over the place grainwise I think this top is so good. I am always a bit worried cutting off grain with stretch fabric because it seems to usually mean the side seams end up all twisted. So far that has not happened with this. But then its almost on straight grain except for the ruched cuffs.  

Anyway so far wearing it so good. 

Have a great weekend and thanks for popping by my blog,

Bracken

Grey Flapper dress

I actually tried to add short sleeves to this and it did not work. So this is another idea that has not quite worked out. I suppose I am becomming more adventurous which in the end has to mean not everything works!

Never the less it is a nice short slip dress and I expect to wear it loads. Maybe with a Tshirt under and tights because we have tickets for the theatre in December. I think this would work as a going out dress. Assuming it does not get too cold. Its simple but not average.  

Though maybe not shown to its best when I walk the dog in walking boots! Still it was a nice day and this was practical at that time. 

Its made using a pattern I have owned for ages and its the first time using it. I made ( almost if you ignore the straps) view A and this is an Arrivestry pattern. I have always been a big fan of Arrivestry designs.

The dress is a very lightweight stretch woven fabric that almost looks like lightweight suiting but it would be too light weight for most suit trousers I think. Maybe shirts though? I have quite a lot more of it so will have to decide what to do with the rest of it. I used to wear a lot of grey when I was younger but it kind of disapeared from my wardrobe so maybe its time it came back in again.

I did not use the straps that came with the pattern partly because I am lazy and it meant getting the pattern back out of a storage box to cut them out and also because I had intended to add elastic type sleeves and this looked weird so I unpicked them and had to think again and in the end went with the original dress design not what I had in my head.

I have since worked out how to make it work – I reckon I just need tubes sewn at the under arms with elastic at the neck edge but I worked that out after I had finished fixing this. 

The straps I used in the end are just long strips with lace sewn on and then wide elastic to gather them so its a very easy fitting dress this one! The elastic is sewn into place as the straps get sewn onto the dress. It gives a pretty bulky \”big\” lace strap that kind of looks crunchy being crochet cotton lace but whatever. Its a different look. 

Well I suppose I have also used another stashed pattern which is really good and at least managed NOT to sew another TNT pattern up. I really need to try to be adventurous in what I decide to sew but this does take effort. Its so easy to just keep remaking the old favourites, and yes they are favourites, so to some extent I do like doing that, but its also good to have variety and try new things. I think many people do the same with this. Its safe. You know the pattern so know how to make it work. Its easier to ignore the new stuff and go with safe because after all all sewing is a risk. You might ruin the fabric that, even when cheap, costs quite a bit more than most of us can afford to lose. 

I really need to carry on working though my hundreds of patterns now because it is making life more interesting. Although turning out stuff to blog about is far more difficult. I have to remind myself that I started to blog to become part of the sewing community. To connect. Not to blog. The sewing is better when its shared with like minded people who interact with you and you with them. 

I do not sew to blog. I blog because I sew!

Have a wonderful adventurous weekend.

Bracken


Black Broderie TVW style skirt

The black broderie fabric I used or this skirt is left over from my recent Accidentally Gothic Top. Its really the same pattern as the Strawberry skirt just in different fabric and with less frills and added lace.  

I actually cut two frills for the black skirt too but ended up just with the one.


 I decided it was more likely to be worn with the single frill. It has the same cotton lace as my top. I am sure the second frill will get used on something at some point so will not be wasted.

Where the frill attaches to the skirt body I just sewed and overlocked the edge. Then I added a row of lace above the frill and lace along the bottom edge. I also finished the waist in lace. This has no interfacing so is rather an experiment. I have no idea if this will mean the waist stretches but the lace is quite stable so I am hoping!

I took this after wearing it hence the creasing.

It makes for a pretty edge to my waistline anyway.

Summer is nearly over for this year so I am trying to get another break somewhere away before it gets too cold so assuming I manage to arrange time off work I intend to take both this skirt and my Strawberry skirt away somewhere. 


Its too cold now for many of my shorts and summer tops but I think these two skirts will work well with tights or leggings under them and transition into the early autumn that is fast approaching. Its worn here over my mesh T shirt dress/top.

This is my grey glitter sweatshirt. I found it goes really well over this skirt. I really should try and get some more of that lovely sweatshirt fabric with lurex because I have lived in this top all summer. Time to start thinking of sewing up sweatshirts and coats I suppose!

Are you already planning your winter sewing?

Bracken

Almost a disaster! – Remodelling my orange tiger track pants.

 I found the original version of these, shown below, totally unwearable. I kind of felt old in them. And unstylish!

These were the trousers I made a few months ago that I just could not bring myself to wear:

So they had to go. Its really a very small change to make them OK and these became wearable for my every day life. So weird really because all I have done is add ankle ribbing. But my journey to this point was rather involved and not at all as planned.

Having made the decision to change them I also decided not to get rid of them. I toyed with just adding a row of elastic to the ankles which felt kind of 90s? Or maybe 80s? Not sure! But I was not convinced I would wear them then either.

I would have worn as PJs but such waste of good fabric. Thats the issue tho. I love the shiny shiny velvet tiger print but its just too much!

So then I spent ages taking them appart with the intention of recutting into leggings.

So, what I decided to do was cut the back centre panels of the leggings ( shown below) from the old track pants because I never wear them – so I decided to make them into a new item.

Using the same pattern as these green ones which I love but they are pretty worn now and this fabric would make a nice version of these I think – and be more wearable than my track pants. This was not, as it turns out, a good idea because at the very least these were a nice pair of PJ bottoms. The problem is I just never wore them as track pants they were just \” too much\” for me. So I wanted to recut into something new and not waste the lovely shiny shiny velvet fabric.

Well what a disaster. I intended to make them into these style of leggings and I checked the pattern fitted etc then cut the wrong bits!

I realised I had cocked up big time because the pattern parts would not fit onto the old track pants despite my previous planning had said they would, so I had a problem, because this meant I had trashed the track pants for nothing. 

So what to do – Well recut a new back panel of course and remake back into track pants since I still have some of this fabric and if nothing else I want to salvage for PJs. I am hoping the unused bit will be the same colour as the original cos they have only been worn a couple of times so washed once or twice at most so hopefully the back is the same shade as the rest of them! Luckily I did get the nap right when recutting the back panel so not all a distaster that day!

Oh disaster, disaster! I was so upset. I just could not believe this had happened. Its been a few years since I made such a bad mistake. So I gave up on that having trashed my last bit of fabric and I recut the back of the leg to remake the original track pants I had just butchered and I need to resew them back up.

And then try to get the leggings parts out of the remaining bits of fabric left over so now I have to resew the track pants and also make some leggings as well!

Then I cut out the leggings parts. But then I managed to somehow cut the wrong part – I cut the back side panels instead of front centre panels! Disaster!

And of course it also explained why the pattern parts would not fit. When I had planned I put the correct pattern pieces onto my old track pants but when I cut I used the wrong bits. 

Never cut things out after a hard day at work when you are feeling tired is what I would say after this mess!

Now after all this messing around I did not have enough fabric left for my leggings.  But I have remade the track pants using a newly cut back panel.

I then added ribbed ankles as I had originally thought about though I was going to just put elastic into them and I think ribbing works so much better, but at this point I was desperate.

I put the waistband back on. I did improve this on the original trousers because I rushed the first one to take them to Scotland and it was a mess so not the worst thing to redo that bit of these trousers either. 

The end result is I actually have made these more wearable or at least they feel better and I have bought more of the tiger stripe fabric from Minerva ( luckily they still have some left because its a sale item! Not that it helps because paypay is still someway off but if I delay buying this I may not get any more of it – meaning I have really trashed my fabric, and its just wasted – so now I am short of money as well and I cannot really aford this sort of mistake this month after already paying out for new tyres for my car. Life is never easy is it!!) so the leggings will eventually happen and now I will have to make two pairs of them so I do not waste what I already cut out. One with tiger centre panels and one with tiger side panels! 

So really this weekend has not been the best one for crafting!

Does this kind of error happen with things you do?

Bracken

LACE – free knitting pattern


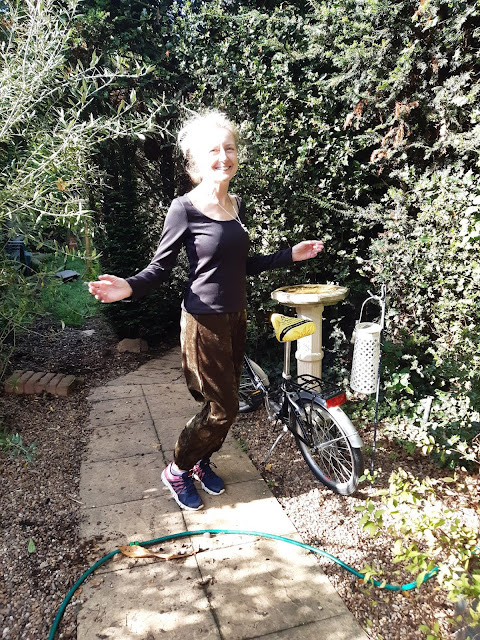
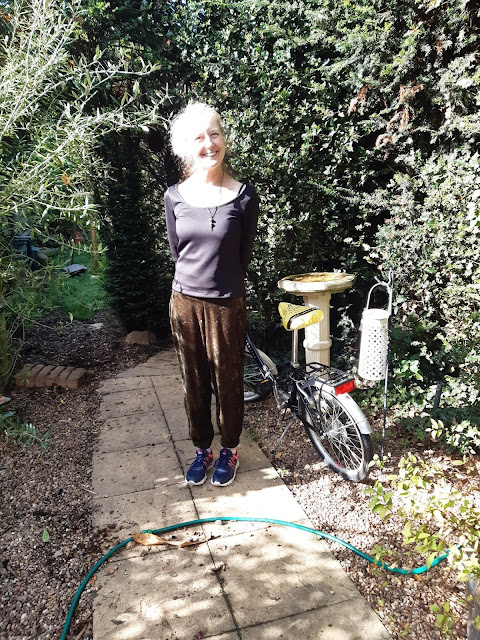
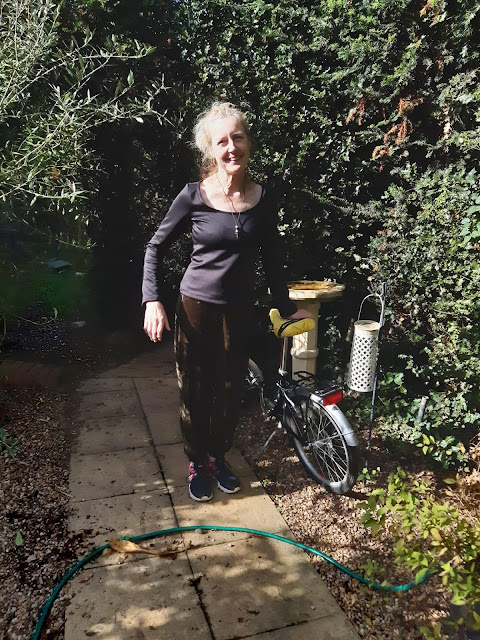
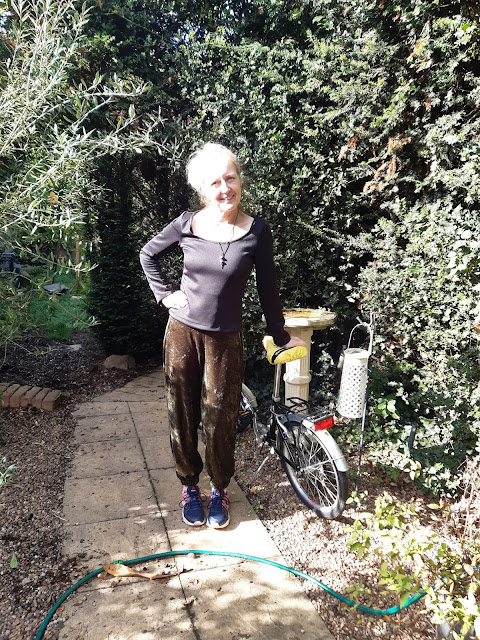
This is my Autumn jumper cos it will not be as warm as some I own but still warm enough for the next couple of months. Its meant to be likea warm long sleeved top rather than a big winter jumper.

I started making a similar jumper from one of my magazines but its just did not work and turned out so big. Then I investigated some very old books I have that give different stitches but no actual patterns. You need to calculate your stitches to make something from these. I never ever used them before so this is a first but I thought being as it turned out so well I will share it. 

So assuming you understand my directions there is a free knitting pattern here that works really well if you have oddments of different yarns of a similar type. These are all kind of textured fluffy yarns of differnt fibres. Though I think it would work just as well in just one yarn as well. I have oddments of similar yarns though to get this look.
The blue and white are Lister Lee Tropicana,  Burgundy and both shades of pink are Sunbeam Paris, Green is mohair leftover from the cable jumper. I used the green doubled. The rest are single strands.

Pale blue and pale grey both left over from the blue glittery aran – by the way I have just started a second version of that so hopefully soon can give you a much better version of the aran pattern because I know my first attempt was rubbish. I need to learn how to write them properly. 

All the yarns have a slubbed effect so are kind of similar although meant to be knitted on different sized needles though all would come under chunky yarns. I cheated anyway and just knit the entire mix on 6.5mm needles. It took 2 weeks to knit this so it must be simple because I never knit anything that fast usually.

Ah and the trousers were made by me as well 😄

LACE PATTERN:

Pattern is multiples of 11, + 2 (to make up the end of the pattern), + 2 (edging stitches)

Knit edge stitch every row. 6.5 mm needles.

Front and Back

Cast on 59 stitches using the 6.5mm needles. There is no ribbing so you go straight into the lace stitch which gives a nice wavy edge. Stretchy cast on. I used the long tail method for this. I think my usual aran cast on would be too tight for the lace edging I want to create.

2 rows plain garter st.

Set the pattern – Row 1: 1 edge st k, 2p,   yarn over to make hole, 3k, knit 3tog, 3k. h, 2p,  yarn over to make hole, 3k, knit 3tog, 3k. yarn over to make hole, 2p  h, 3k, knit 3tog, 3k. yarn over to make hole, 2p,  h, 3k, knit 3tog, 3k. h, 2p, h, 3k, knit  3tog, 3k. h, 2p, 1 edge st k.

Every reverse row is purl all holes and purl all knit stitches, knit all purl stitches and knit the edge stitches.  Right side row: pattern as rows 1, 3, 5, 7 on chart.

Follow chart. On the right hand side the numbers are for different rows.

Codes used: knit 3 stithces together

=knit 3 stitches together

 0 = yarn over to make a hole

–  = knit

= purl


1

2

3

4

5

6

7

8

9

10

11

12

13


.


0

0


.

7

.


0


0


.

5

.


0


0


.

3

.

0


0

.

1

 Back  

To shape neck when jumper measures the length you want it to. Mine was 60cm or 23.5 inches long before I began the shaping for shoulders. Well the back has no shaping really. I did a straight across neck so to shape the neck cast off 20 stitches, put 19 stitches onto stitch holder ( or spare yarn) cast off remaining 20 stitches.

 Right side row: pattern as above.

Front as back till it measure 48cm. Then pattern on right side until central 9 stitches which go onto a stitch holder. Then you need to decrease along the neck edges as you do the next few rows. My calculations are shown here:

So you need to complete each shoulder seperately. I have done this with two balls simultaneously and knit both sides before but I got very confused doing that with this pattern and ended up ripping it all back and redoing so I would advise do each side seperately unless you are vey confident you can manage this. 

On the wrong side on neck edge knit 2 together then continue in pattern. Right side as pattern, wrong side as pattern. Every 4th row on wrong side knit 2 together at neck edge. When there are twenty stitches remaining knit until the front matches the back length. Cast off.

Do the other side of the neck to match. But on second side knit2 together on Right side of work. Just ensure you have the same total number of rows at the end. Cast off the final 20 stitches.

Sleeves:

I decided on using just 3  lace panels with stocking stitch sides. 

The pattern is 33 +2 +2

So knit edge stitch, p2 pattern 33 stitches

1 edge st k, *2p,   yarn over to make hole, 3k, knit 3tog, 3k, 2p,  yarn over to make hole*,  repeat from * to * two more times then 1 edge st k.

I cast on 37 stitches and every 5 rows increased until I had 57 stitches then knitted in pattern straight until the desired length. It did occur to me this might be nice with 3/4 sleeves as well. I ended up doing normal length. Mine are too long and measure 55cm to each point of the lace. You had best check against your own body if you make this because mine are a bit too long!

Neck: if you feel confident to knit in a circle seam both shoulers. If not just seam one the knit the ribbing then seam the other side and the ribbed edge

So which ever way you do this: pick up 19 stitches from back stitch holder, 10 stitches from Right front, 9 from stitch holder and 11 from left front and rib for about 6cm and cast off with a larger needle to ensure a stretchy edge. Sew sleeves on and sew up the sides.


Thanks for visiting the blog,

Bracken

Strawberry Skirt inspired by The Vampires Wife


I have considered this kind of skirt for a couple of months. I should have sewn it sooner in fact.

They are pretty and simple to make and good in hot weather. Just a basic A line mini with frills added. I used my version of The Vampires Wife style blocks that I made for my dresses a couple of years ago to make these. In fact its reallytime I made some more because I love those dresses.

This skirt has turned out very easy to wear, comfortable and girly without being too much like a rara. Not that I have anything against a rara skirt but I did not want one with this being so floral as well.

They vision I had in my head was to have simple side zip. I used a normal lap zip since did not have an invisible zip and did not want to wait to make this once inspiration struck. I used what I had available. Its all overlocked inside to make it neat and has a basic facing of the same fabric round the waist.

The strawberry cotton fabric I bought on a whim years ago and never used. I really don\’t like florals so no idea why I bought this though it is sweet I suppose. I had just under 1m of this. I do not like to waste fabric and in the end decided its well over time to have used this. I think I bought it in 2014! It will rot away in the stash and never get used at this rate!

I just went all out frilly. Thats got rolled edges on top and the bottom of the top frill, and on just the bottom of the bottom frill. The top edge, of the bottom frill, is not rolled. I just sewed then I overlocked the edge to neaten it and voila! Very The Vampires Wife I think.

I am very happy with this and just wished I had made it at the start of summer rather than at the end. Still never mind. This will also work in Autumn with thick tights and a jumper, and could even be layered with the black skirt (I am planning to make next) under the strawberries as a petticoat if it gets cold. This works quite well because the black skirt is hopefully going to turn out longer so shows up underneath. More on that once I finish sewing it up!

I really need a day out now to wear this somewhere other than just down the garden.

Happy weekend!

Bracken

BBQ party outfit from Three free patterns

 I got asked to a BBQ. Its been so long since I went out to a friends house for dinner. It was aparty with work colleagues so I did not want to dress too informal and slob-like so decided to make a new top. 


This was the  tie front Wilder top which is a free Mood Sewciety pattern. I used a drapey silky woven leopard print viscose for this and it has worked well. The fabric was very fray-ey butotherwise his was relatively sinple to make. Mood have a version where you can make the sleeves wider which I considered but in the end decided to save fabric and make the basic version and I am quite happy with the width of these sleeves.

This is the MDF198 – The Wilder Top Sewing Pattern.

https://www.moodfabrics.com/blog/how-to-add-volume-to-the-bottom-of-a-sleeve-free-pattern-hack/ 

I actually made a skirt from the offcuts of my leopard print fabric as well but ended up wearing that before I wore this, due to the party being postponed.

 I thought this leopard print top would tart up my old wide leg black trousers nicely, but then decided to make some new ones since the old ones look a bit pilly and old. They were made a long time ago now back in 2017 I think! I have worn them constantly so its worth time to make a replacement and this is a nice fabric though creases a bit more than the original pair.

I bought this nice stretch linen (linen-look because I have no idea of the fiber content!) fabric last winter in a sale and had been planing to make some trousers from it for ages. In the end I made a top as well so had a whole new outfit for the BBQ.

 I decided to use the Mood Jamesia pattern for the trousers because I just love this pattern – so another free pattern though this one is a TNT pattern and its about time I made some nice work trousers from it because I have several play versions from this pattern already. 

https://www.moodfabrics.com/blog/the-jamesia-pant-free-sewing-pattern/

These are some of the previous versions of my Jamesia trousers. 

The pattern is really for wovens but I have also made a few pairs in jersey without adding the waist darts and just adding elastic round the waist. They make good track pants!

Then the BBQ got put off for another week so I added the top which is Angela Kane\’s sleeveless top pattern 532 in size small. I think you need to sign up to the website to get this but thats easy to do.

 https://angelakane.com/sewing_patterns/patterns/sleeveless-top-sewing-pattern-532.php

When making this I forgot to sew the darts but it actually fits well without so I may repeat that in the future. I closed the back with a bow made from black satin ribbon.

And this is a very wearable smart, and a not too formal, nice party outfit. And as a bonus I finally got round to making some new black work trousers!

Thanks for stopping by.

Have a great week

Bracken